Payouts is an end-to-end intelligent solution for businesses looking to make instantaneous bulk outgoing payments/ disbursals on a day-to-day basis. It allows you to use multiple payout methods and has one of the highest success rates in the industry.
Here is how Payouts dashboard works
In order to access your Payouts dashboard

Now under Payouts -> click on the ‘Access’ option to proceed

The ‘All-New Cashfree Payments Payouts Dashboard’ is divided into the following parts:
Summary:
The Summary section gives an overview of the key metrics in the Payouts dashboard. It gives you an insight into your daily and weekly transactions along with details of your available balance.

All the data can be filtered out using the ‘Date filter’ to view details only for a specific period.

Beneficiaries:
This section shows you the list of beneficiaries with whom you have transacted in the past.

You have the flexibility to search for beneficiaries using the Beneficiary ID, Phone No., or Bank A/c Number using the Search & Filter option. You can also filter for beneficiaries based on a selected time period.

Creating Beneficiary:
- You can easily add a beneficiary by clicking ‘Add Beneficiary’.
- Enter a Beneficiary ID, Name of the beneficiary, Phone Number, Email ID and Address. Click Next and enter the payment details. This is optional. These details will be required when you initiate payouts to a beneficiary bank account.


The beneficiary details will be displayed on the Beneficiaries screen. Click on the added beneficiary to view more details.
To add beneficiaries in bulk, go to Batch -> Upload file

Transfers:
Under ‘Transfers’, you can see the details of all payments in different stages- All, batch, approve batch, reversed
Making a transfer:
To make a transfer,
- Click on Quick Transfer. Enter the Beneficiary ID, Transfer Method, Transfer ID, Amount, and Remarks.
- Transfer methods supported are bank transfer, Paytm, UPI, and Amazon Pay.
- After clicking on Confirm, the transfer details will be displayed in the Transfers screen.

The entire list of transfers will be visible in the All tab inside Transfers.
You can see an overview of all the transfers that were made in a certain time period.
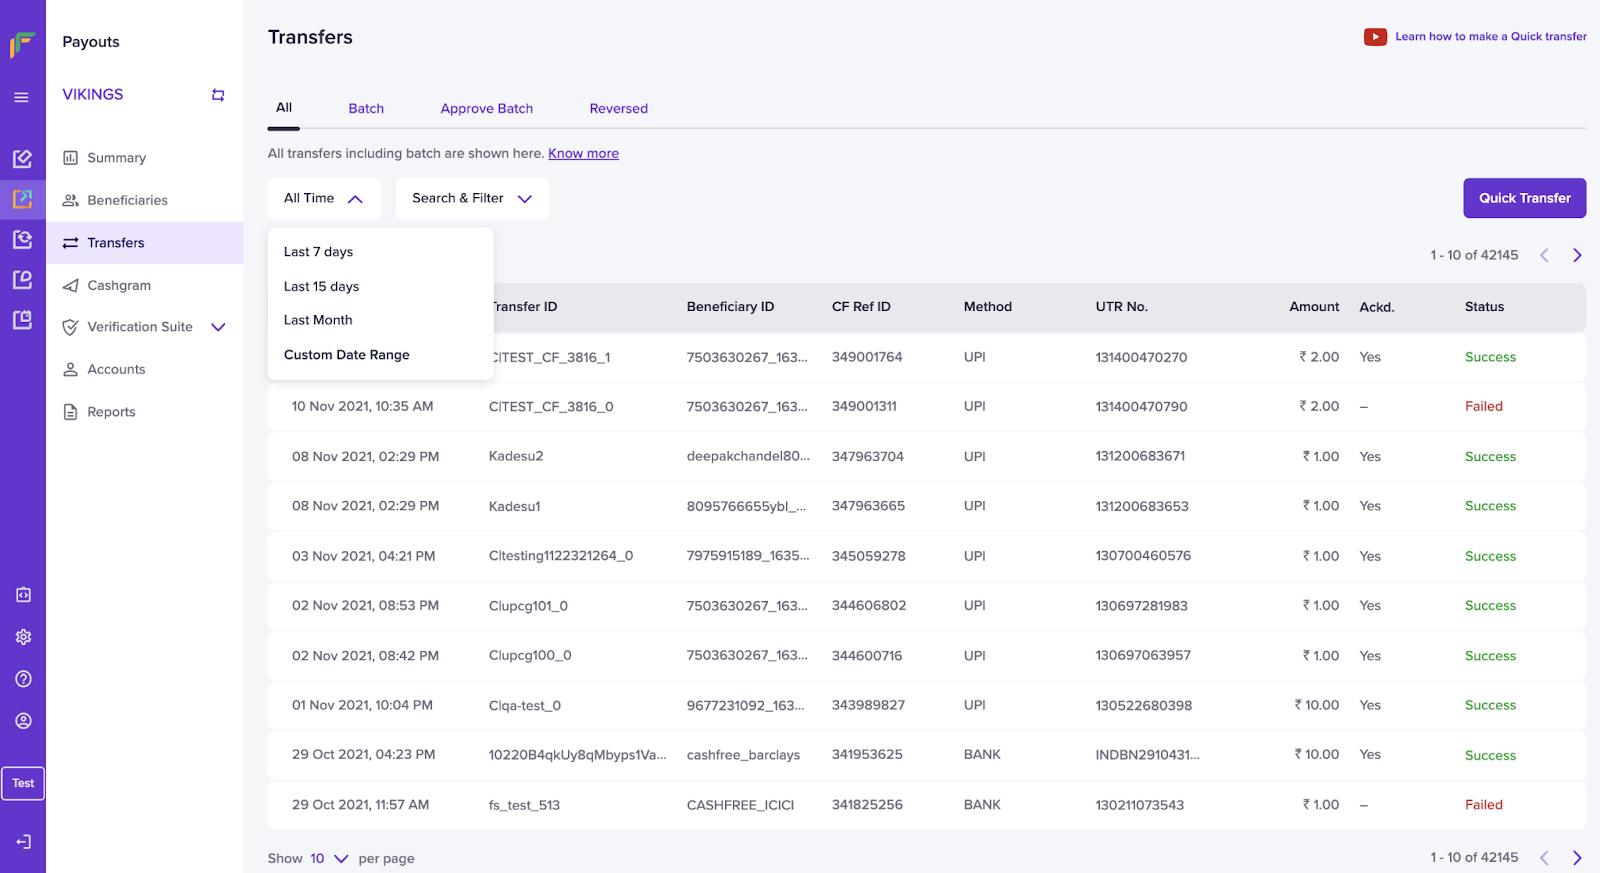
Click on a transaction to view the ‘Customer details’ like Beneficiary Name, Email, Transfer method, etc

You can filter the transfers according to their current status and also search for a particular transaction through the transfer id.

Batch:
You can use the Batch Transfer feature to create and initiate a large number of transfers to beneficiaries. You must add all the required details in a single file as per the required format and upload the file. Download the sample file to know what details are required to be filled in the batch file.
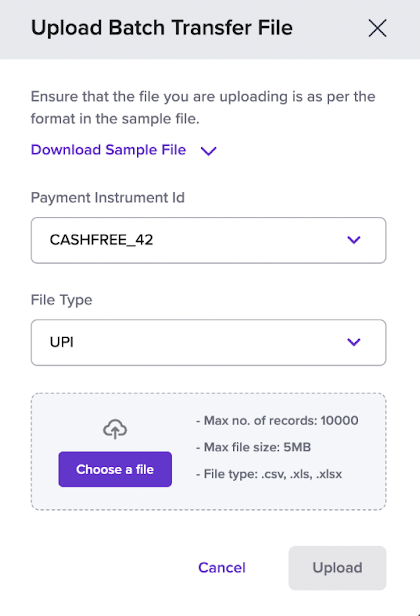
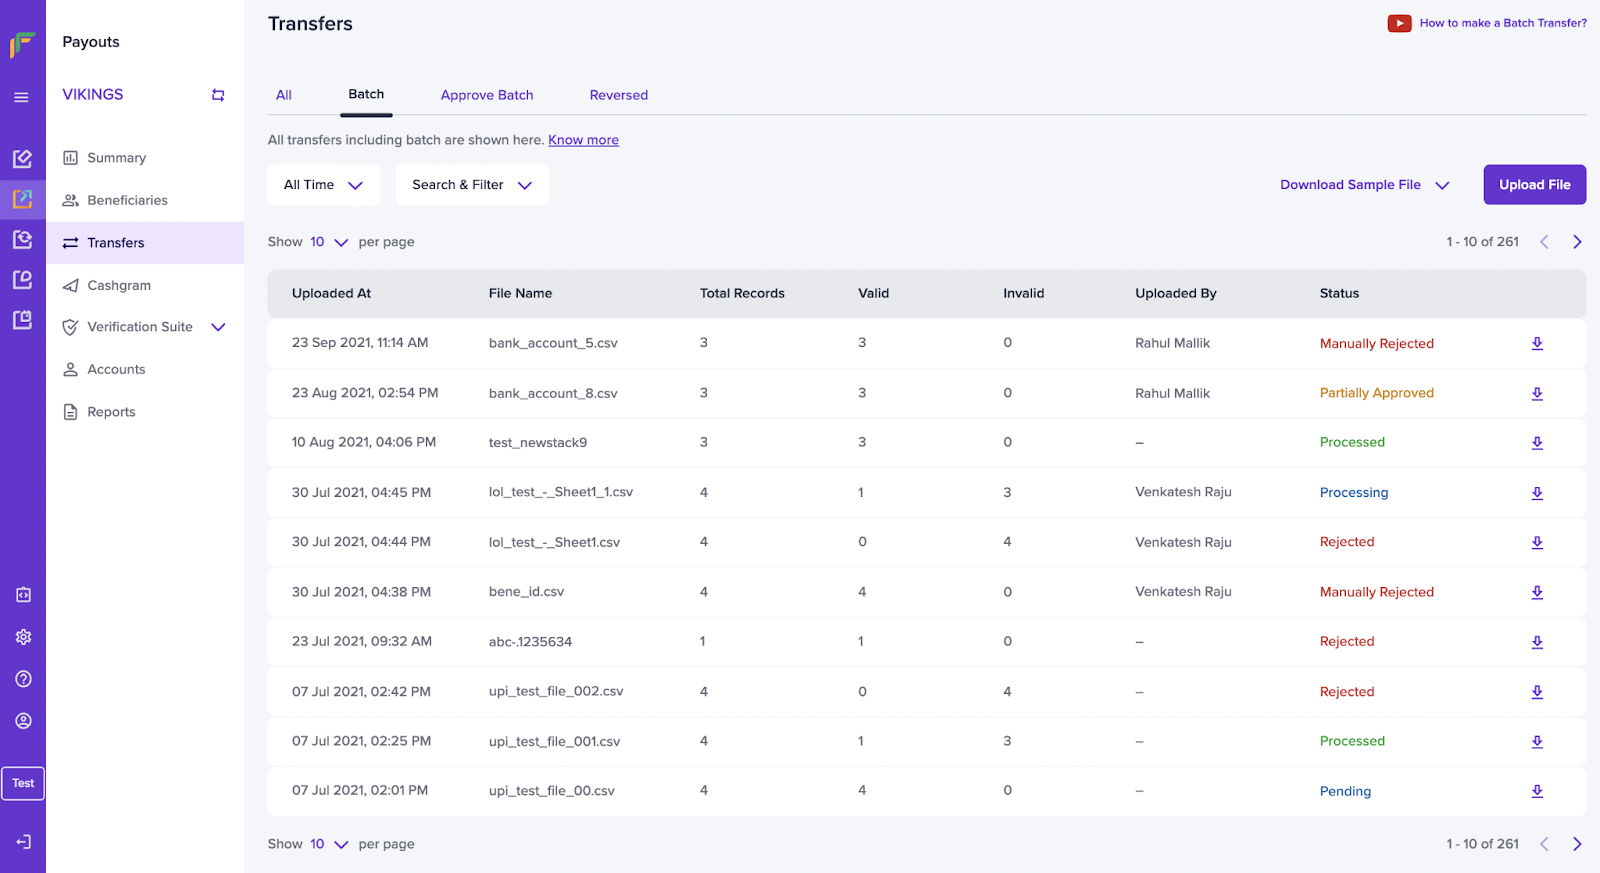
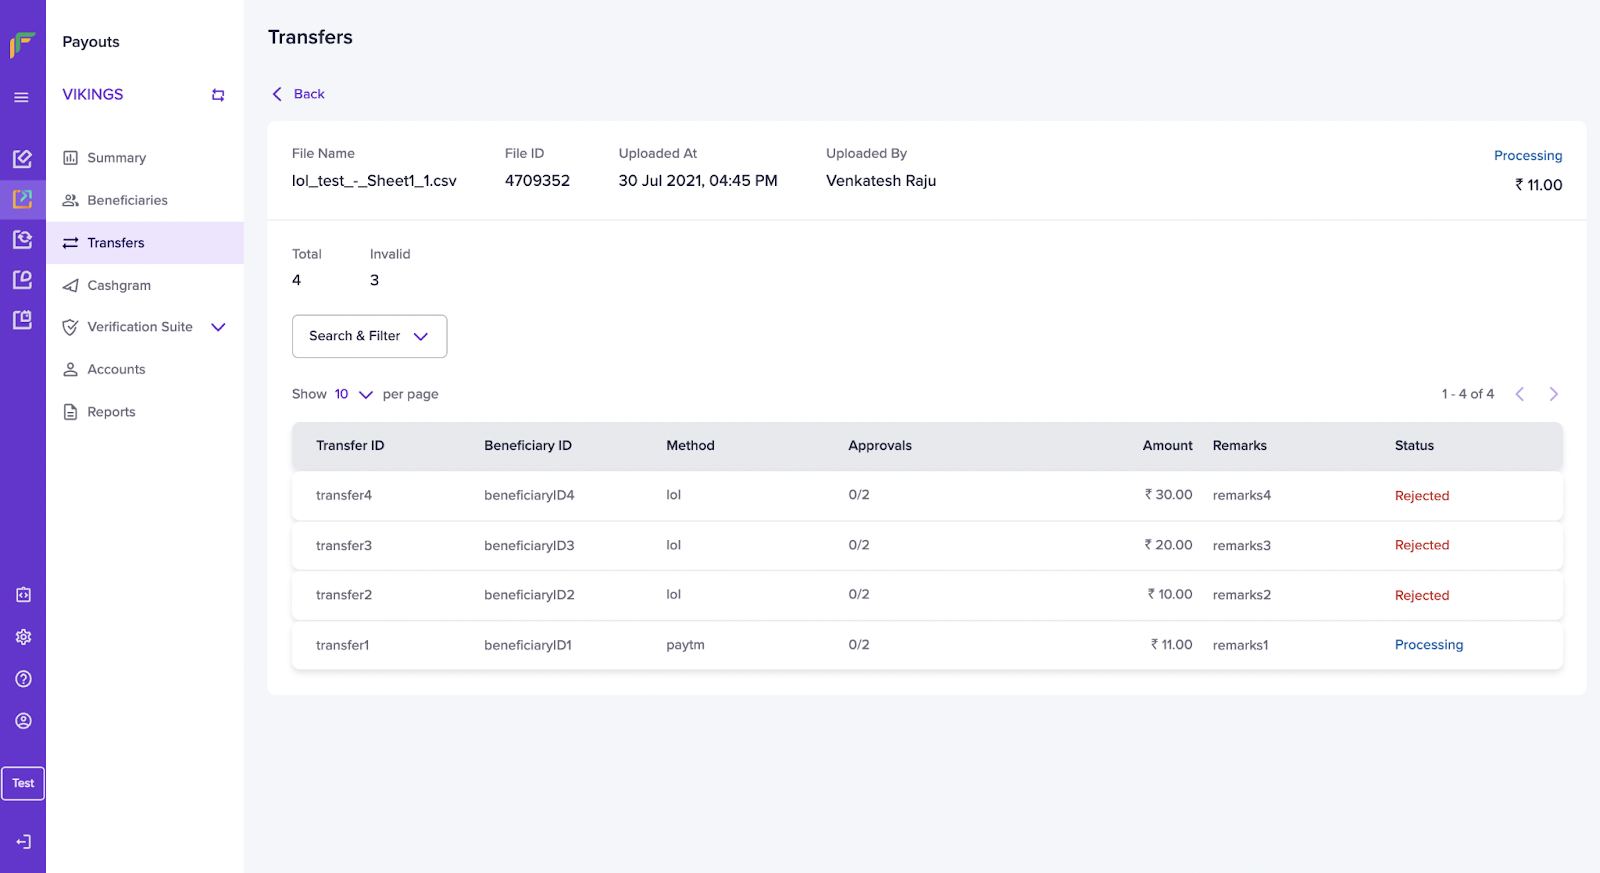
You can view the status of the uploaded files and also download them to view more details. Click on the file to view the individual transaction details uploaded in the file.
Approve Batch:
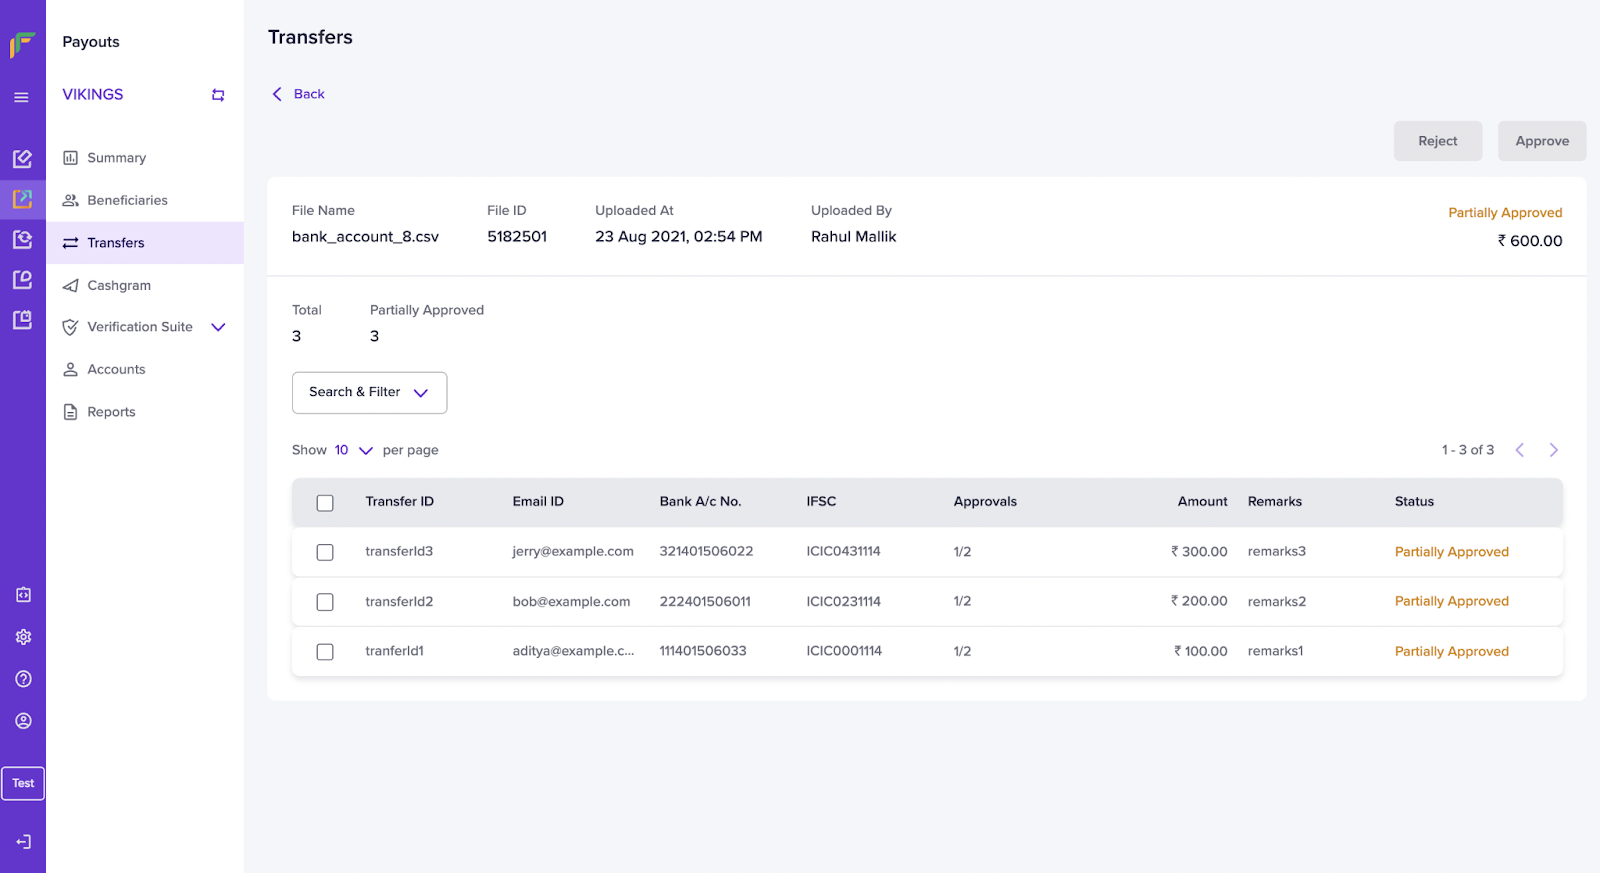
Under this tab, you can see the transfer batches that are pending for approval or have been partially approved. You can click on the particular batch to get further details.

Reversed:
All the transfers that are reversed by the bank are displayed in the Reversed section. You can also download (Export) all the transfers for further analysis.
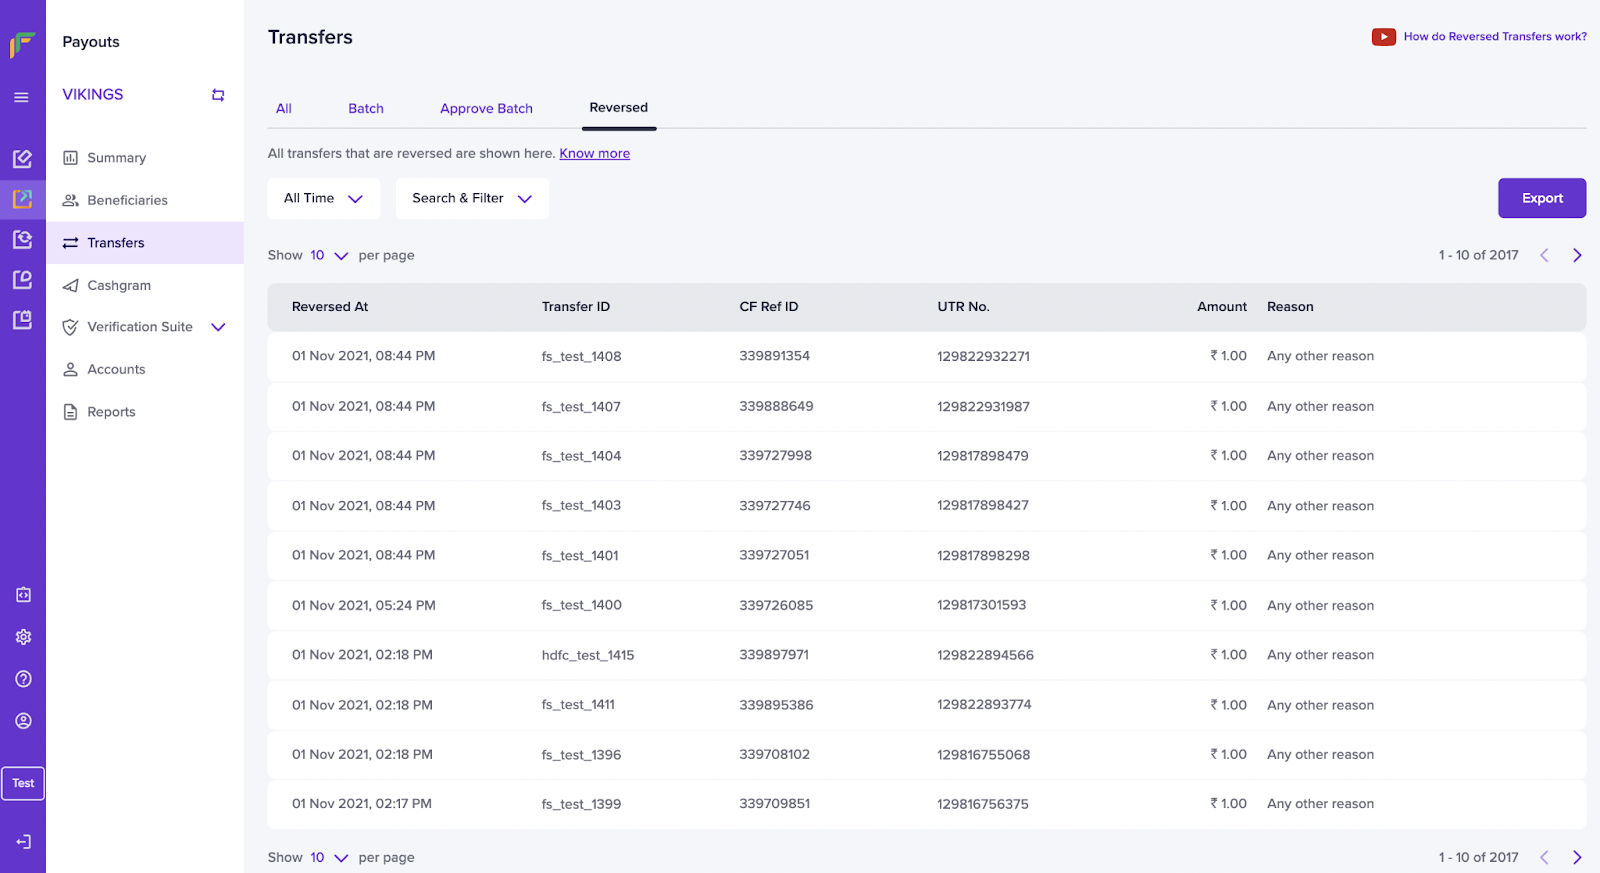
Select a transfer that has been reversed to view more details about the transaction.

Cashgram:
Cashgram is a specially crafted web link to send money to your beneficiaries from your Payouts Account. With Cashgram, you can send instant refunds for COD payments, cash prizes to the customers, security deposits that need to be returned, and so on, even when you do not know their bank account details.
Creating a Cashgram:
To create a Cashgram,
- Click Create Cashgram.
- Enter the Cashgram ID and specify the Payout Type.
- Enter the Beneficiary Name, Beneficiary Phone Number, Beneficiary Email ID, and the Amount to be transferred.
- In the Cashgram Valid Till field specify the date till when the Cashgram link should be valid.
- Enter the Reason and Remarks.
- In the Send Cashgram via field, select how you want to notify the beneficiary.
- Click Create.
The Cashgram link is created and sent to the beneficiary. The beneficiary can click the link and provide the required details to receive the amount.

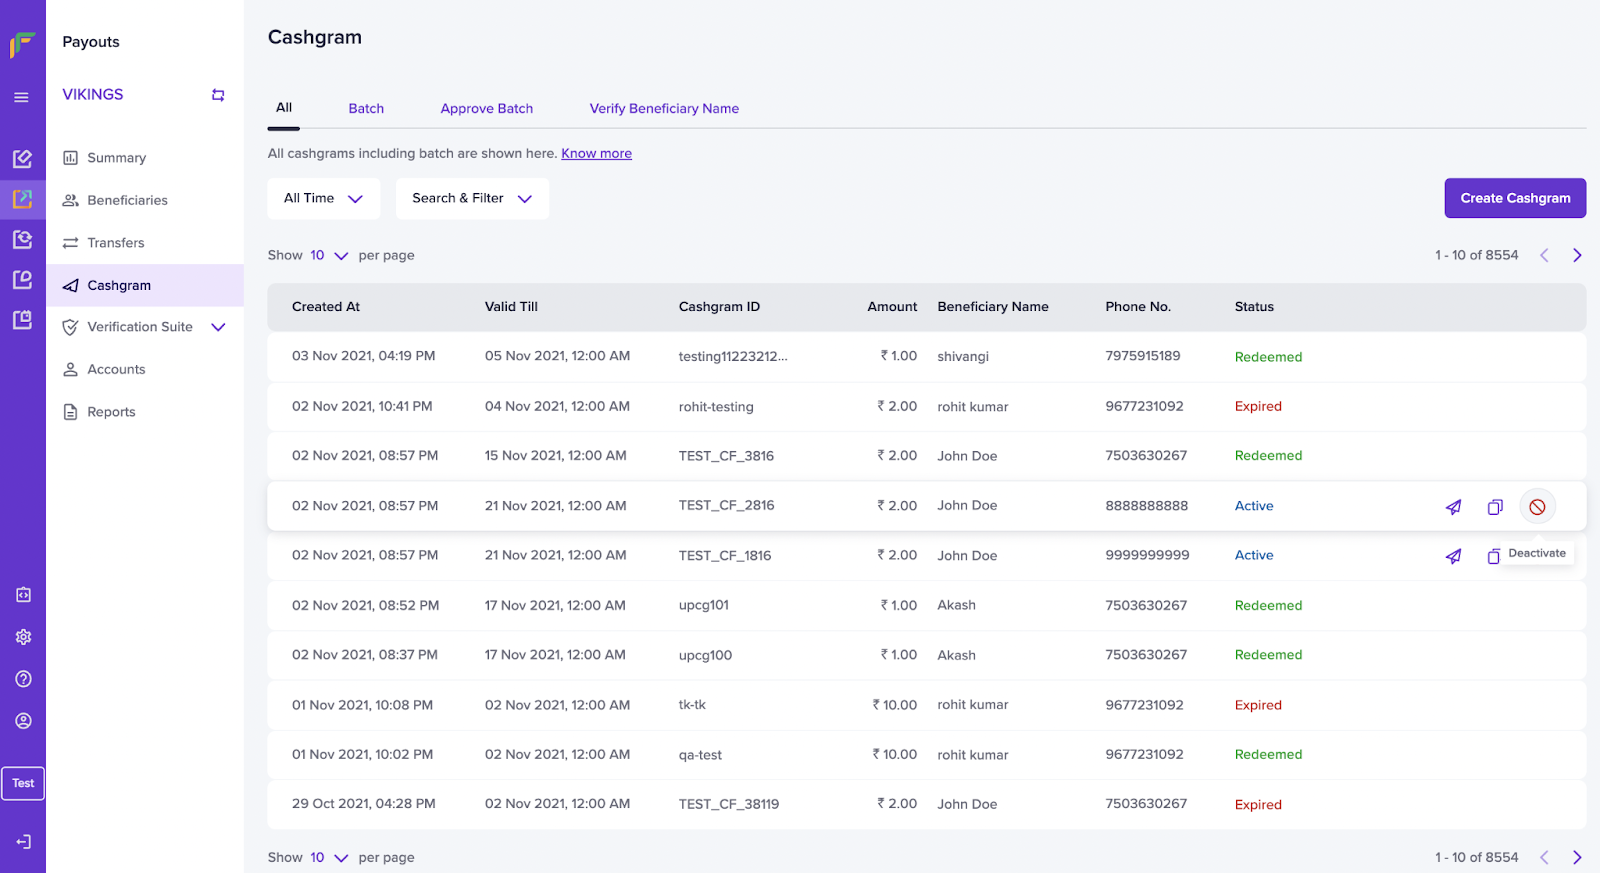
You have the option to send the Cashgram, copy the link, and also deactivate it in the Cashgram section.
Batch:
Use the Batch Upload feature to create and send Cashgrams to a large number of beneficiaries. You must add all the required details in a single file as per the required format and upload the file in the Batch Upload section. Download the sample file to know what details are required to be filled in the batch file.

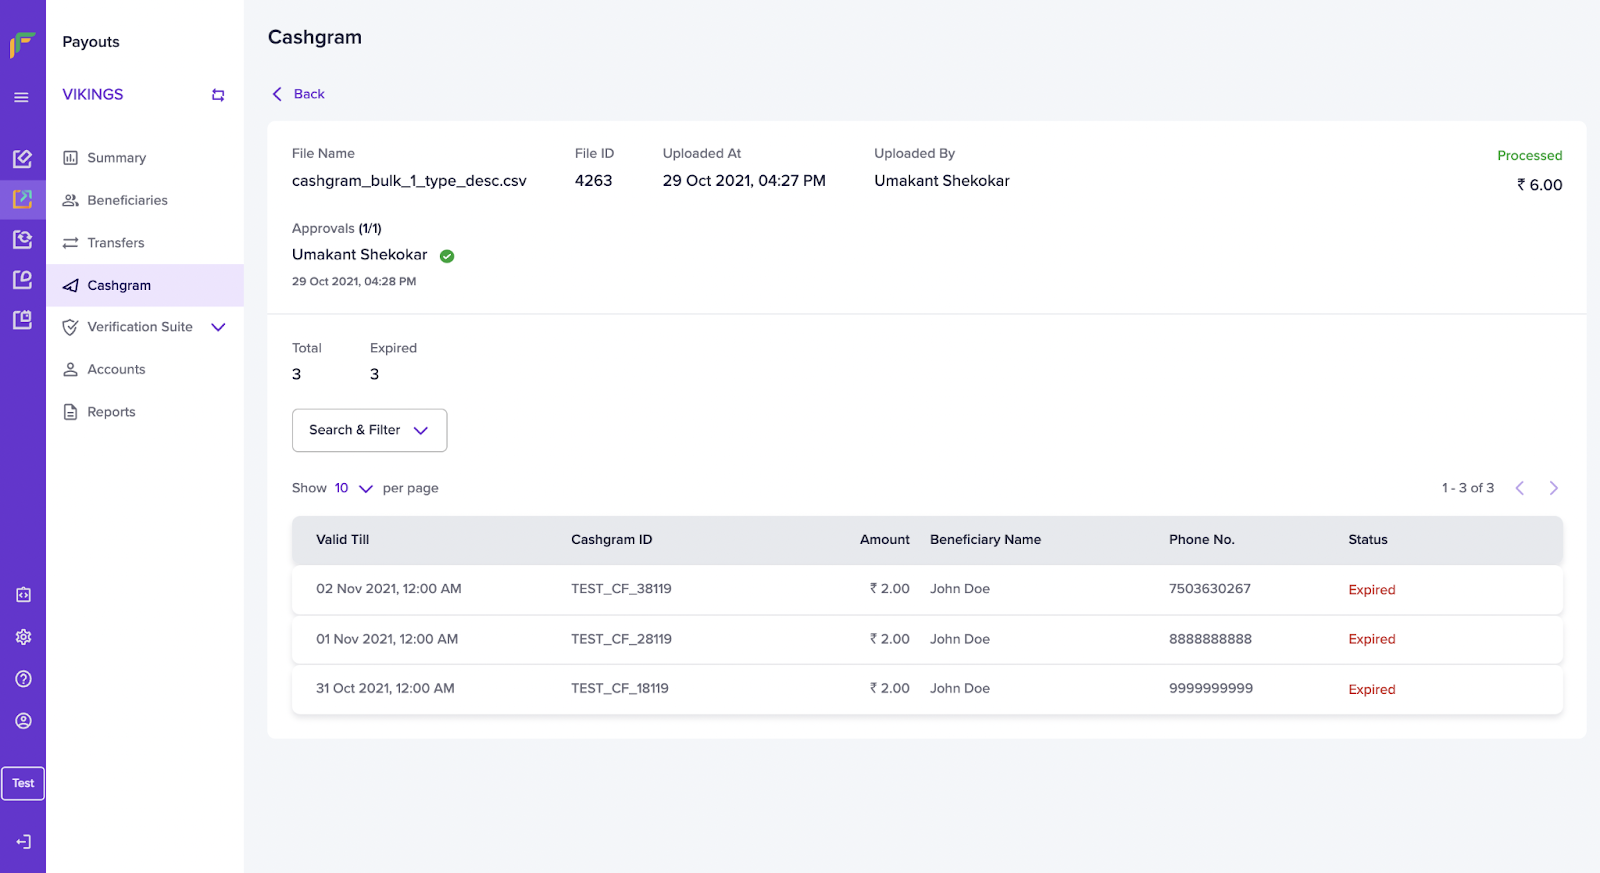
Click on the file to view the individual Cashgram details uploaded in the file.
To upload a batch file,
- Click Upload File > Click Choose a File to select the file you want to upload and then click Upload.
The uploaded file will be visible in the Batch section.

Approve Batch:
All the Cashgrams that are pending for approval will be shown in the Approve Batch section.
Verify Beneficiary Name:
Businesses can verify beneficiary names to ensure that the refunds, reimbursements, claims, etc., are sent to the intended beneficiary account only. This feature helps you to verify the bank account and also ensures that the bank account is registered in the name of the intended beneficiary.
To verify the beneficiary name, select the Cashgrams which you want to verify and click Verify.

Verification Suite:
Use Verification Suite to verify bank account details, UPI VPA, IFSC, and also the PAN instantly. You can use it to verify beneficiary details during onboarding, to ensure that the right details are available with you for payments.
- Bank Account Verification:
You can verify the bank accounts individually or when you have a large number of account details to be verified, simply upload all the details in a file as per the format suggested and upload it.
To verify a bank account, click Verify Bank Account. In the Verify Bank Account screen, enter Account Holder Name, Account Number, IFSC, and Phone Number provided to you. Click Verify. You will see a success message if the bank account exists.


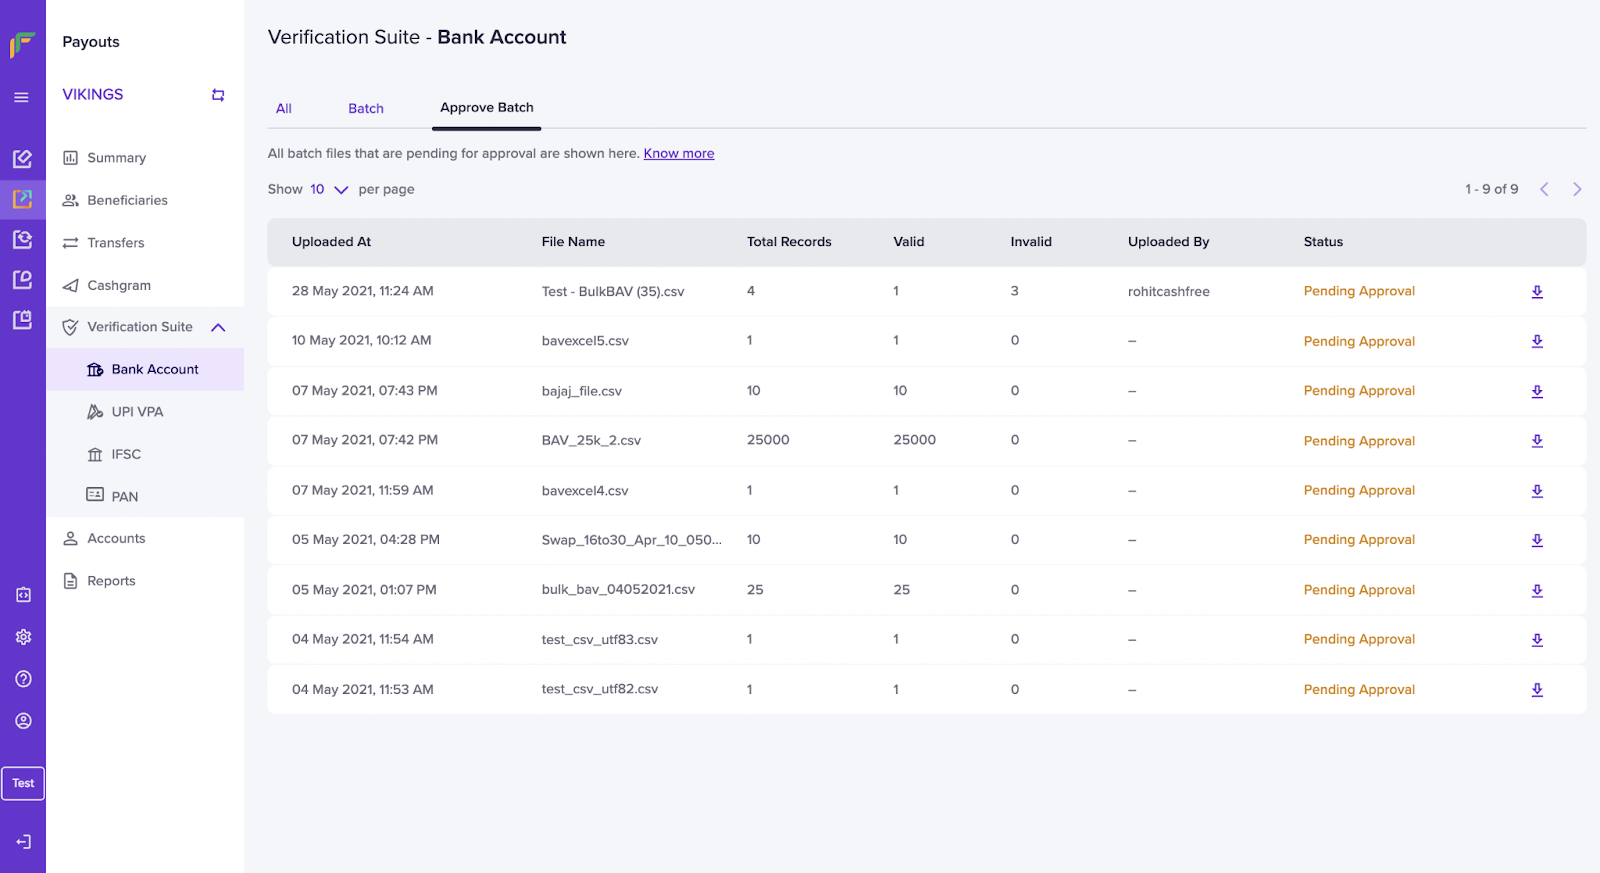
Use the Batch Upload feature to verify a large number of bank accounts at a time. Add all the required details in a single file as per the required format and upload the file in the Batch Upload section

All the files that are pending for approval will be shown in the Approve Batch
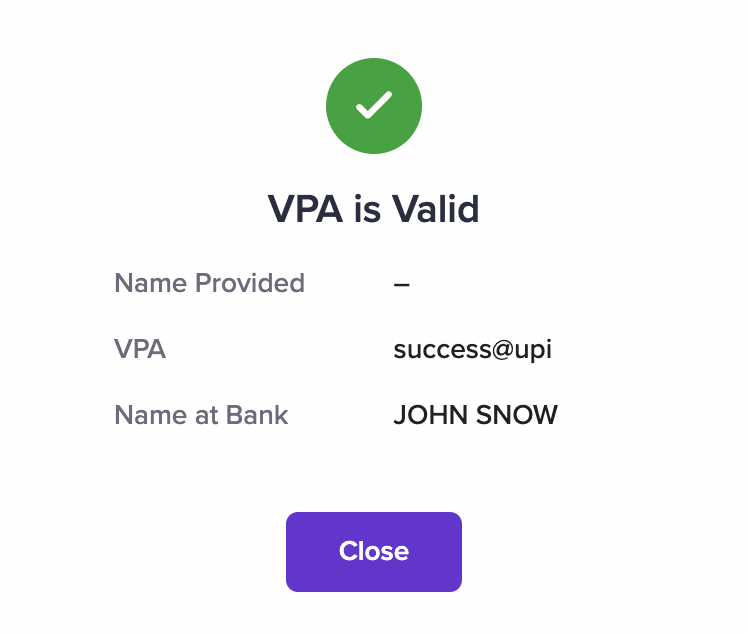
To verify the beneficiary UPI, in the Verify UPI VPA screen, enter the beneficiary VPA you want to verify. Enter the Account Holder Name provided to you, to verify it against the name registered at the bank. Click Verify. You will see a success message if the VPA exists.

To verify IFSC, enter the IFSC which you want to verify and click Verify. You will see a success message if the IFSC is valid.


The feature helps you to validate if a particular PAN is valid, also check if it belongs to an individual or a business.
To verify PAN, click on ‘Verify PAN’ and enter the PAN number to be verified. You will get a success message if the PAN number is valid.


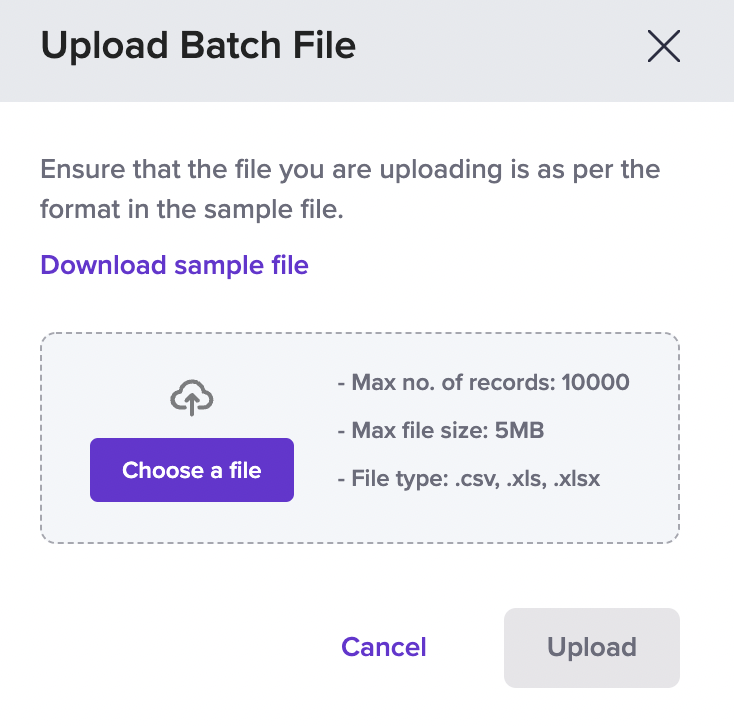
You can also do a bulk verification of up to 10,000 PANs at a time. For this, click on upload file, and add all the required details in a single file as per the required format and upload the file.
Accounts:
Using the Account Summary section you can know your payouts account balance and account credit. You can also manage your withdrawals, and set a low balance alert for your Payouts Recharge Account.

You can view all the transactions made with your Payouts account in the Statement section. The statement includes details about the amount transferred, amount credited, reversals, withdrawals, bank details verification, and transfer between your payout accounts.
Use the filter option to view the statement for any specific event - internal transfers, withdrawals, bank transfers, and so on.

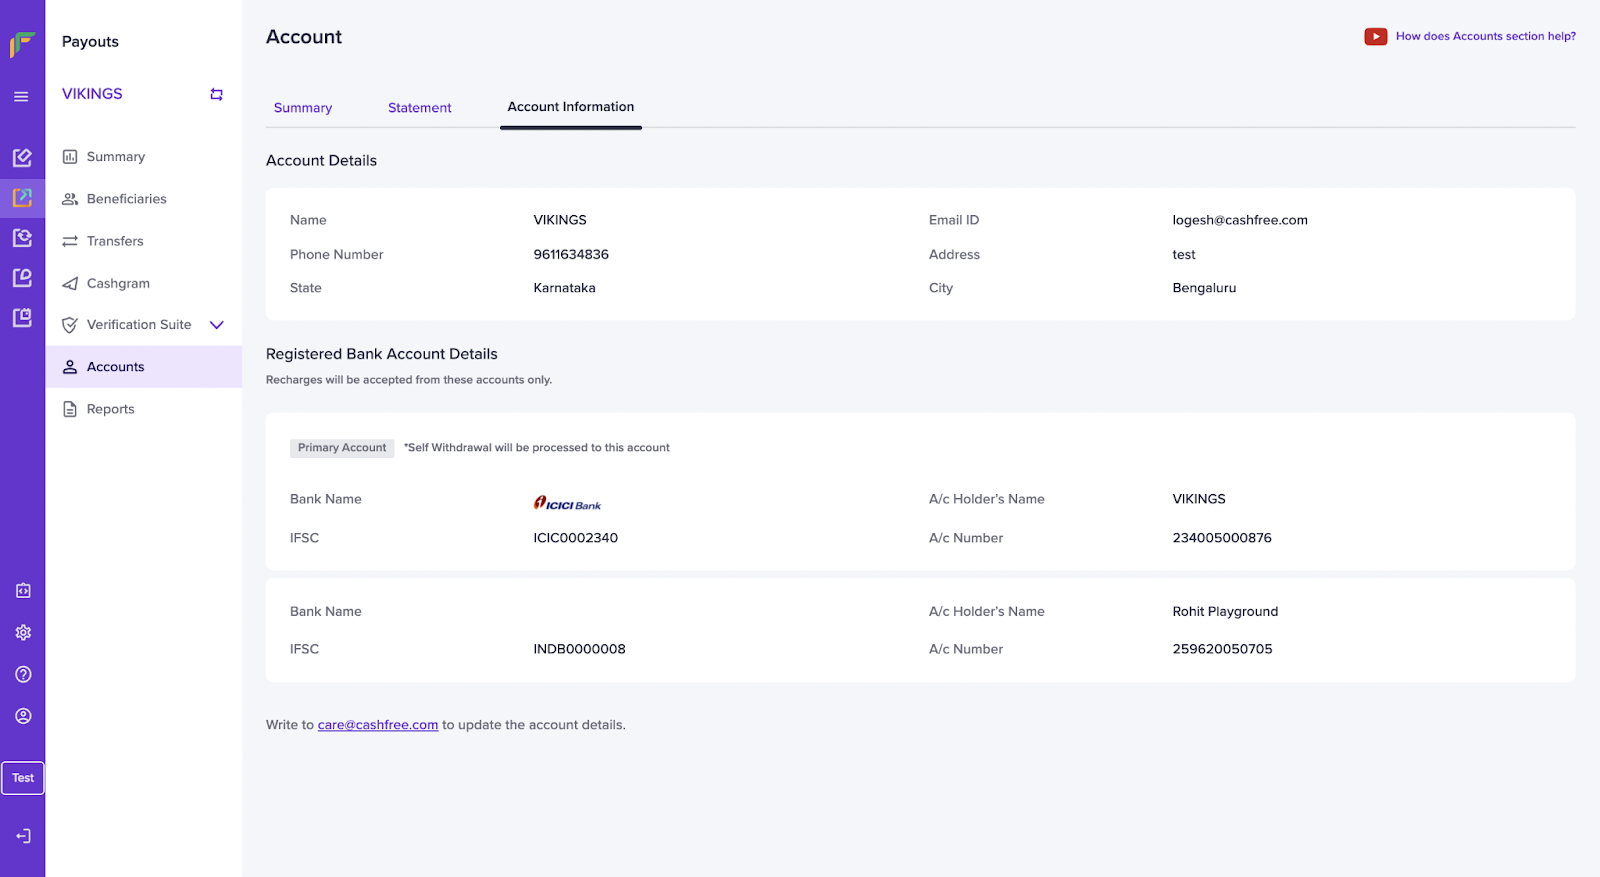
You can view your personal details related to the Payouts Account and the registered bank details in the Account Information section.
Reports:
Cashfree offers a wide range of Reports for merchants to get an overview of the transactions processed, thus helping in making better business decisions.
Cashfree offers a wide range of reports for its Merchants like Transfer, Cashgram, Account Statement, Reversed transfers, Bank Validation, PAN Verification for better understanding & reconciliation of its past transactions.
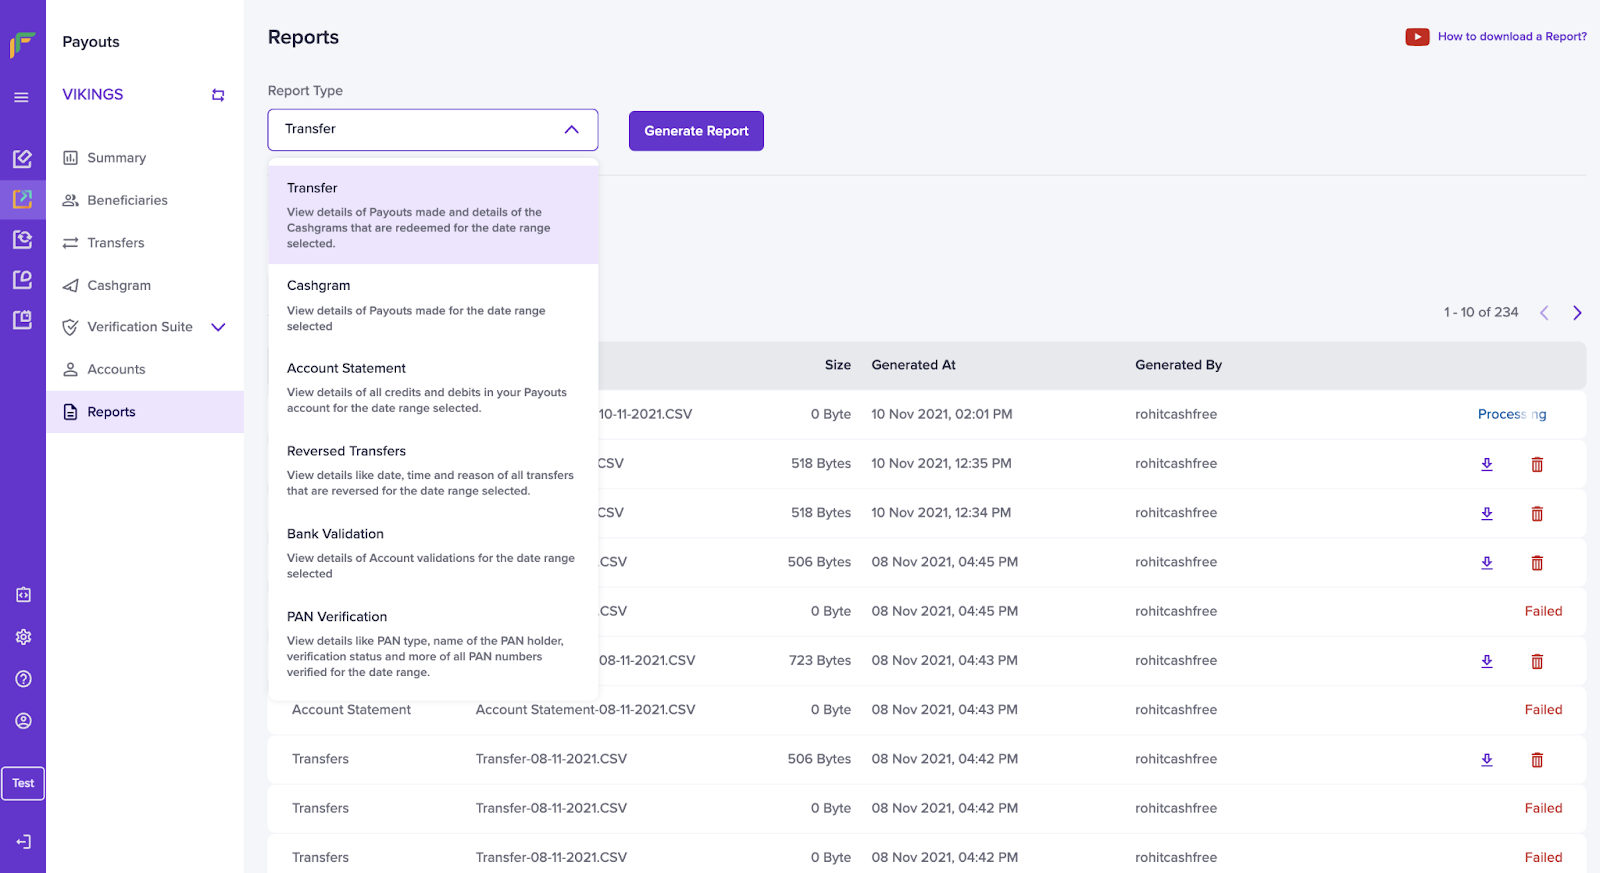
To download the report → Just select the ‘Report type’ → Select the ‘Period’ along with the required filters → & click on the ‘Generate Report’ button to generate the report in CSV format → You can now download the generated report or also delete it.
